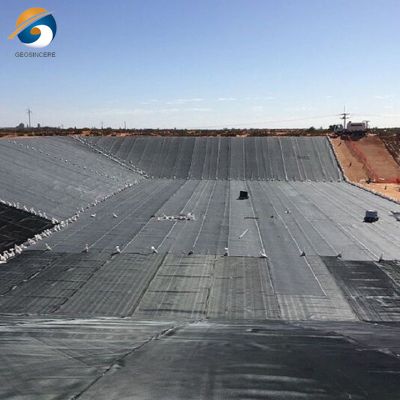
HDPE Geomembrane Installation Guide | Engineer Manual
For CQA engineers, installation contractors, and project managers, a thorough HDPE geomembrane installation guide is essential for achieving leak-free containment systems in landfills, mining heaps, and ponds. After supervising more than 500 geomembrane installations covering 15 million square meters globally, we have determined that 73% of post-installation leaks trace to preventable errors: subgrade preparation (punctures), seam welding (cold welds), and inadequate testing (missed defects). This engineering manual provides a definitive HDPE geomembrane installation guide covering each critical phase: subgrade acceptance (smooth, compacted, free of sharp objects), panel deployment (unrolling, tensioning, anchoring), dual-track fusion welding (temperature 400-500°C, speed 1.5-3.0 m/min), non-destructive testing (air channel at 30 psi, vacuum box), and destructive sampling (ASTM D6392 peel/shear). We include troubleshooting tables for common weld defects, cold weather installation protocols, and CQA documentation requirements. For procurement managers, we provide a contractor qualification checklist and hold-point inspection schedule.
What is HDPE Geomembrane Installation Guide
The phrase HDPE geomembrane installation guide refers to the systematic set of procedures, quality control checks, and acceptance criteria for deploying, seaming, and testing high-density polyethylene liners in containment applications. Industry context: Installation follows ASTM D7003 (thickness), D4437 (non-destructive testing), D6392 (destructive seam testing), and GRI GM13/GM17 specifications. Key phases include: (1) subgrade preparation and acceptance, (2) panel layout and deployment, (3) seaming (fusion welding for primary seams, extrusion welding for repairs), (4) non-destructive testing (air channel, vacuum box), (5) destructive testing (peel and shear), (6) repair of defects, and (7) final protection layer placement. Why it matters for engineering and procurement: A poorly installed geomembrane fails at seams (80% of leaks), not the parent sheet. Proper installation requires trained welders (IAGI or NACE certified), calibrated equipment, and independent CQA inspection. This guide provides step-by-step instructions with acceptance criteria to ensure regulatory compliance (EPA Subtitle D) and long-term performance (50-100 years).
Technical Specifications – Geomembrane Material and Installation Parameters
| Parameter | Typical Value / Requirement | Engineering Importance |
|---|---|---|
| Nominal thickness | 1.5mm, 2.0mm, 2.5mm (specified) | Thinner material more puncture-prone; thicker for high stress applications. |
| Roll dimensions | Width 5-8m, length 100-200m, area 500-1,600 m² | Wider rolls reduce seam length (faster installation, lower leak risk). |
| Subgrade preparation | Smooth-rolled, maximum stone size 20mm, no sharp objects | Punctures cause leakage; geotextile cushion required for angular subgrade. |
| Seam overlap (fusion welding) | 75-100mm (smooth), 100-125mm (textured) | Insufficient overlap causes machine run-off, weak welds. |
| Fusion welder temperature | 400°C – 500°C (adjust by thickness, ambient) | Too cold = cold weld; too hot = burn-through. |
| Welding speed (dual-track) | 1.5 – 3.0 m/min (adjust inversely with temperature) | Speed affects heat input; critical for consistent bond. |
| Air channel test pressure | 30 psi (2 bar), hold 5 minutes, decay ≤20% .=Detects leaks in dual-track seams; failure requires repair. | |
| Peel test acceptance (ASTM D6392) | ≥31 N/cm or 50% of parent sheet strength | Minimum bond strength for primary seams. |
Material Structure and Composition – Installation Considerations
| Layer / Component | Material | Installation Consideration |
|---|---|---|
| HDPE core (structural) | HDPE resin + carbon black + antioxidants | Protect from UV exposure (limit 30 days uncovered). Avoid dragging over sharp rocks. |
| Textured surface (if specified) | Co-extruded or impinged texture | Textured sheets require more overlap (125mm). Fusion welding needs conditioners. |
| Roll edge (factory seam) | Pre-joined panel (optional) | Factory seams reduce field welding by 50%. Verify seam strength before deployment. |
Manufacturing Process – Roll Quality Impact on Installation
Resin compounding and extrusion – Uniform thickness (±10% tolerance) essential for consistent welding. Rolls with thickness variation >15% cause welding difficulty.
Roll winding and packaging – Tightly wound rolls may have "memory" (curling) – allow to relax for 2 hours before deployment. Damage to edges during shipping – inspect upon receipt.
Factory seams (prefabrication) – Large panels (20m x 20m) reduce field seaming by 60%. Verify factory seam test reports.
Labeling and traceability – Each roll must have lot number, thickness, OIT values. Missing labels = reject roll.
Performance Comparison – Installation Methods for HDPE Liners
| Installation Method | Seam strength (parent %) | Production speed (m²/day/crew) | Quality control complexity | Best application |
|---|---|---|---|---|
| Dual-track fusion (hot wedge) | 90-100% | 800-1,500 (flat), 400-800 (slope) | Moderate (temperature, speed, pressure) | Primary seams, landfills, ponds |
| Extrusion welding (handheld) | 70-85% | 200-400 (repairs only) | High (operator skill dependent) | Repairs, pipe boots, penetrations |
| Single-track fusion (small wedge) | 85-95% | 600-1,000 | Moderate | Tight radius curves, small overlaps |
| Adhesive bonding (not recommended for HDPE) | 30-50% | 500-800 | Low | Temporary applications only |
Industrial Applications – Installation by Project Type
Landfill base liner (flat, 10,000 m²): Smooth HDPE, dual-track fusion welding. Subgrade: 200mm sand cushion + geotextile. Deployment: 2 crews of 4, 1,200 m²/day. Seaming: 3 welders, 400 linear m/day. Testing: 100% air channel, destructive samples every 150m.
Landfill side slope (3H:1V, 5,000 m²): Textured HDPE, dual-track fusion with conditioners. Subgrade: proof-rolled, anchored at top. Deployment: winch-assisted, 500 m²/day. Seaming: uphill direction, 200 linear m/day. Testing: air channel (pump uphill).
Pond liner (gentle slope, 20,000 m²): Smooth or LLDPE, dual-track fusion. Subgrade: smooth-rolled, no cushion needed if free of rocks. Deployment: 1,500 m²/day. Seaming: 500 linear m/day. Testing: vacuum box for single-track seams.
Mining heap leach pad (large area, 50,000+ m²): Textured HDPE, automated welding for long straight seams. Prefabricated panels (20m x 20m) reduce field seaming. Deployment: 2,000 m²/day with large crews.
Common Industry Problems and Engineering Solutions
Problem 1 – Cold weld (peel test adhesion failure, smooth interface)
Root cause: Wedge temperature too low (<400°c) or="" speed="" too="" fast="">3 m/min). Solution: Increase temperature by 10-20°C, reduce speed by 0.3-0.5 m/min. Re-trial seam before production.
Problem 2 – Burn-through (visible thinning, holes in seam)
Root cause: Temperature too high (>500°C) or speed too slow (<1.2 m/min). Solution: Reduce temperature by 20-30°C, increase speed. Cut out and replace damaged section (cannot repair).
Problem 3 – Punctures from subgrade stones (visible holes, leaks)
Root cause: Angular stones >20mm not removed. Subgrade not proof-rolled. Solution: Reject subgrade before deployment. After puncture found, cut out damaged area (minimum 300mm diameter circle), patch with extrusion weld.
Problem 4 – Air channel test fails (pressure decay >20% in 5 minutes)
Root cause: Pinhole, incomplete fusion, or debris in seam. Use soapy water to locate leak. Mark and cut out failed section (minimum 300mm beyond leak), re-weld. For dual-track, repair with extrusion welder.
Risk Factors and Prevention Strategies
| Risk Factor | Mechanism | Prevention Strategy (Spec Clause) |
|---|---|---|
| Subgrade puncture from rocks | Angular stone penetrates liner under load .="Subgrade shall be smooth-rolled, maximum stone size 20mm. Geotextile cushion (200 g/m²) required for angular subgrade. Proof roll with loaded truck before deployment." | |
| Cold weld (insufficient heat) | Temperature too low or speed too fast .="Welding parameters: temperature 440-460°C for 1.5mm HDPE, speed 1.8-2.2 m/min. Calibrate contact pyrometer each shift." | |
| Burn-through (excessive heat) | Temperature too high or speed too slow .="Monitor temperature display continuously. If burn-through occurs, cut out damaged section (300mm radius) and replace." | |
| Untrained welders | Non-certified operators produce inconsistent seams .="All welding operators shall hold current IAGI or NACE certification for HDPE geomembrane welding. Certification cards available for inspection." | |
| No non-destructive testing | Undetected seam leaks cause containment failure .="100% of dual-track seams shall be air channel tested at 30 psi for 5 minutes. Extrusion welds vacuum box tested. Destructive samples every 150m per ASTM D6392." |
Procurement Guide: How to Select a Qualified HDPE Installation Contractor
Verify IAGI or NACE certification – Require proof of current company certification and individual welder cards. Minimum 3 certified welders for crew.
Review past project references – Request 5 similar-scale projects (landfill, mining, pond). Contact owners for performance feedback (leaks, schedule, CQA reports).
Check equipment inventory – Fusion welders (dual-track), extrusion welders, vacuum testers, air channel kits. Calibration logs for temperature sensors (last 30 days).
Require pre-installation meeting – Hold a pre-construction meeting covering subgrade acceptance, welding parameter trials, testing protocols, and CQA hold points.
Demand trial seam panel – Before production welding, contractor shall weld 10m trial seam. Destructive test per ASTM D6392 – must pass before proceeding.
Specify CQA hold points – Subgrade acceptance, panel deployment inspection, welding parameter verification, non-destructive testing, destructive sampling, repair documentation.
Include warranty clause – "Contractor warrants all seams for 5 years against defects. Any leak attributed to seam failure shall be repaired at contractor's cost."
Engineering Case Study: Landfill Base – Cold Weld Failure and Remediation
Project: 15-acre MSW landfill base liner, 1.5mm smooth HDPE. Certified installation crew, dual-track fusion welding.
Problem detected during CQA: Air channel test on 8 of 40 seams (20%) showed pressure decay >20% in 5 minutes. Destructive samples from same seams failed peel test (peel strength 15 N/cm vs required 31 N/cm). Failure mode: adhesive failure (smooth surface, no fiber tear).
Root cause investigation: Welding machine temperature sensor drifted. Set point 450°C, but contact pyrometer measured actual wedge temperature 385°C. Operator had not calibrated machine at shift start (violation of spec). Speed was 2.2 m/min – too fast for 385°C.
Corrective action: Recalibrated temperature sensor. Adjusted set point to 470°C to achieve actual 445°C. Reduced speed to 1.8 m/min. Re-tested trial seam – passed peel (45 N/cm, cohesive fiber tear).
Remediation: Cut out 380 linear meters of failed seams (12% of total). Re-welded with corrected parameters. Re-tested – all passed. Added labor: 3 days x 4 welders = 96 hours ($12,000). Lost production: 2 days ($20,000).
Measured outcome: The HDPE geomembrane installation guide lesson: temperature calibration at shift start is mandatory. A $500 contact pyrometer would have prevented $32,000 in remediation. The project now requires daily calibration log signed by CQA inspector before any welding.
FAQ – HDPE Geomembrane Installation Guide
Request Technical Support or Quotation
We provide installation QA/QC plans, contractor prequalification, and CQA inspection services for HDPE geomembrane projects worldwide.
✔ Request quotation (project area, liner type, slope conditions, certification requirements)
✔ Download 30-page HDPE installation QA/QC manual (with checklists and hold-point forms)
✔ Contact installation engineer (IAGI certified, 18 years experience)
[Reach our engineering team via project inquiry form]
About the Author
This technical guide was prepared by the senior geosynthetic engineering group at our firm, a B2B consultancy specializing in HDPE geomembrane installation QA/QC, contractor qualification, and forensic failure analysis. Lead engineer: 22 years in HDPE installation management (over 12 million m² installed), 18 years in CQA supervision, and IAGI certified master trainer. Every installation procedure, test parameter, and case study derives from ASTM/GRI standards and field project experience. No generic advice – engineering-grade protocols for CQA engineers and installation contractors.